I’ve already mentioned how important it is to create a mood board when refreshing your home.
It’s just as important to create one during a renovation, so you can have a clear overall vision—from materials and finishes all the way to decorative details.
Today, I’d like to dive deeper into this and show you how to create the perfect mood board for your spaces!
A mood board is often physical, combining images with real materials such as tile samples and fabric swatches.
When created this way, it becomes a true sensory board—you don’t just see it, you can touch it too.

(credit:freepik)
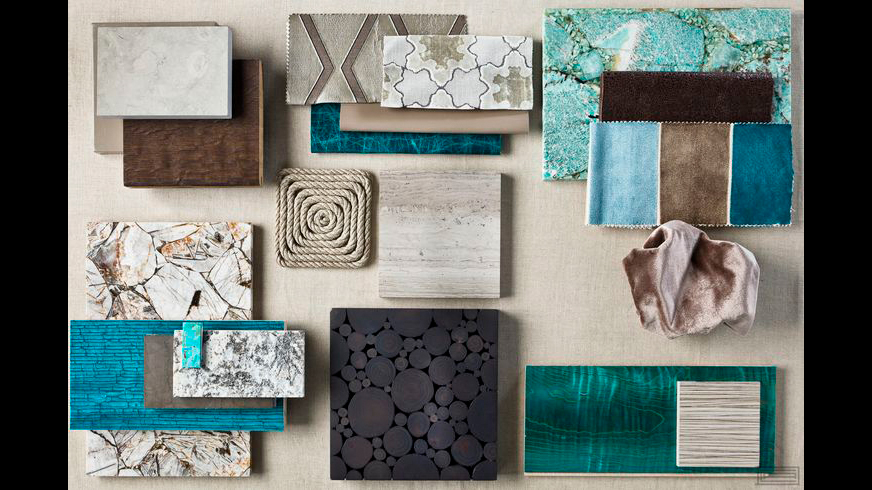
(credit: Charles Allem Design)
That said, it’s not always possible—or easy—to create a mood board like this.
It’s often much simpler to build one digitally using images.
Technically, a digitally created and well-structured board is called a concept board, but most people still refer to it as a mood board— and I will too for simplicity.
So, how can you create a mood board?
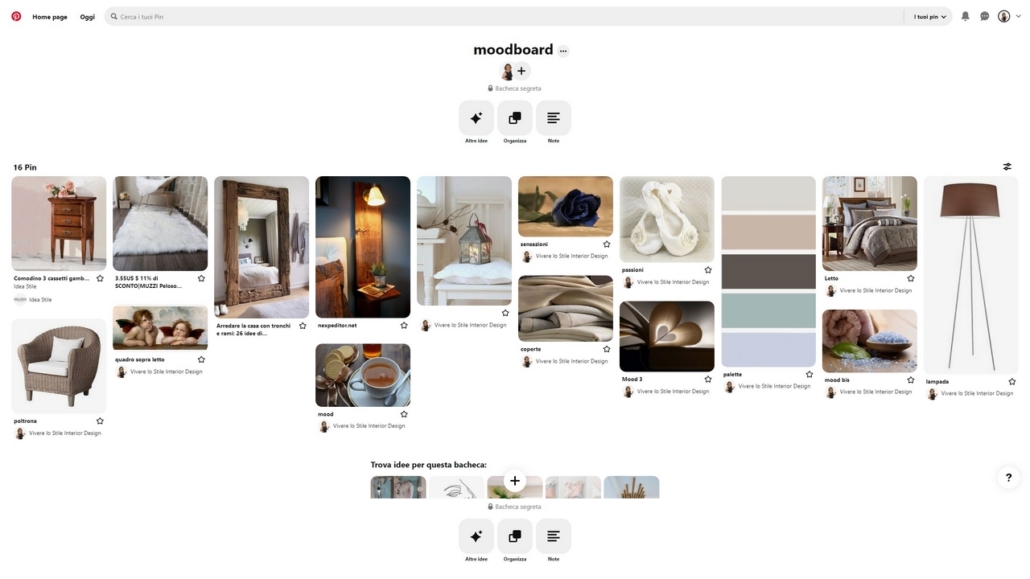
I believe most people already have this app, and it’s truly an endless source of inspiration.
Using it is one of the easiest and fastest ways to create a mood board.
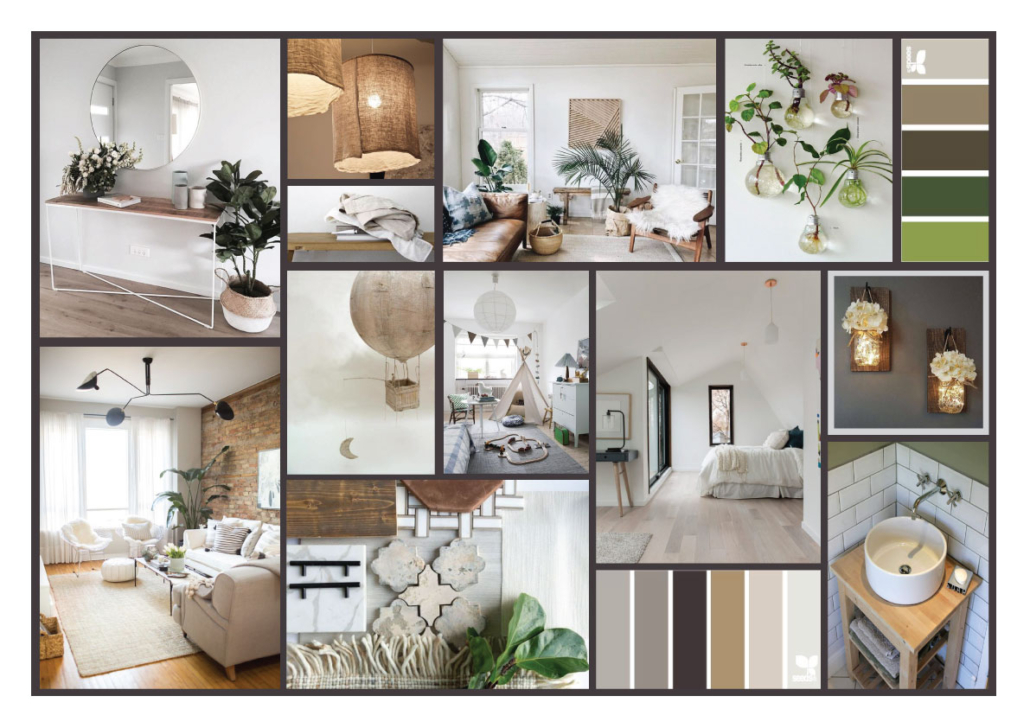
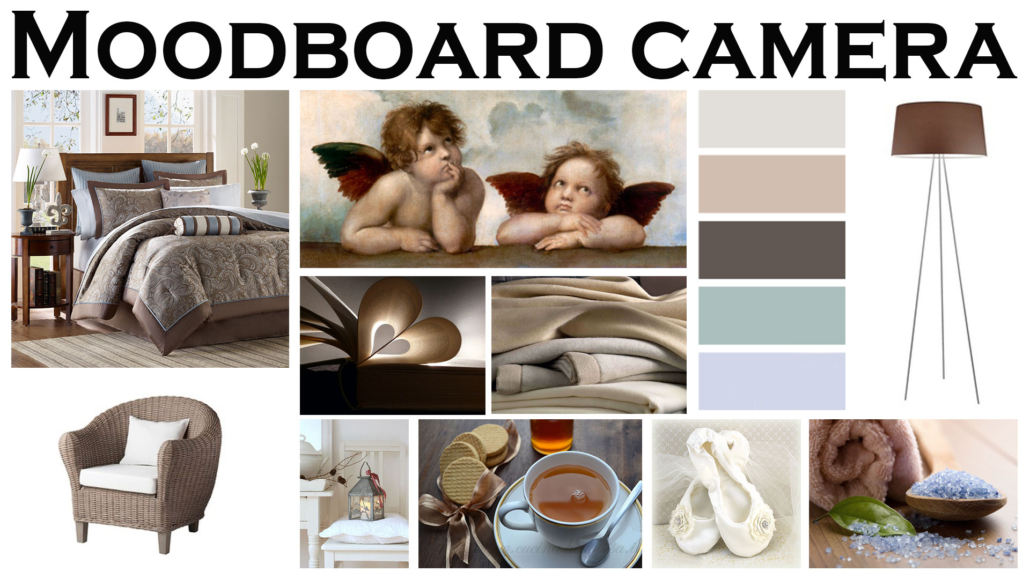
Create a board for each room in your home and start collecting images of furniture, accessories, and colors you’d love to use.
You can save images directly from Pinterest, but—at least on desktop—you can also upload your own. So, if you already know which sofa you want, for example, add that exact one in the right color!
Try to avoid saving images of entire rooms. Instead, focus on single elements, so backgrounds and other details don’t interfere.
This way, your board will include everything that inspires you, and you’ll immediately see whether things work well together or not.
You can add or remove items with just one click.
It’s fun—and incredibly useful.
One of the best things about Pinterest is that you can create both public and private boards.
It is possible to share private boards with others if you’d like feedback or even to collaborate.
You can also add notes to each image.
I often use this method with my clients, especially at the beginning, because it helps me better understand their tastes and create highly targeted proposals.
Unfortunately, you can’t export a board directly from the app.
And if your board contains many images, a regular screenshot isn’t very helpful, but there’s a workaround: a browser extension called “Full Page Screen Capture.”
This tool allows you to capture the entire page—in this case, all the images in your board—and save it as an image or a PDF.
Et voilà—your mood board is ready to print!
– POWERPOINT OR CANVA
Canva is an online tool similar to PowerPoint, with the added advantage that you can customize the file size from the start.
There’s a free version and, of course, a paid one—but the free version is more than enough to create a moodboard.
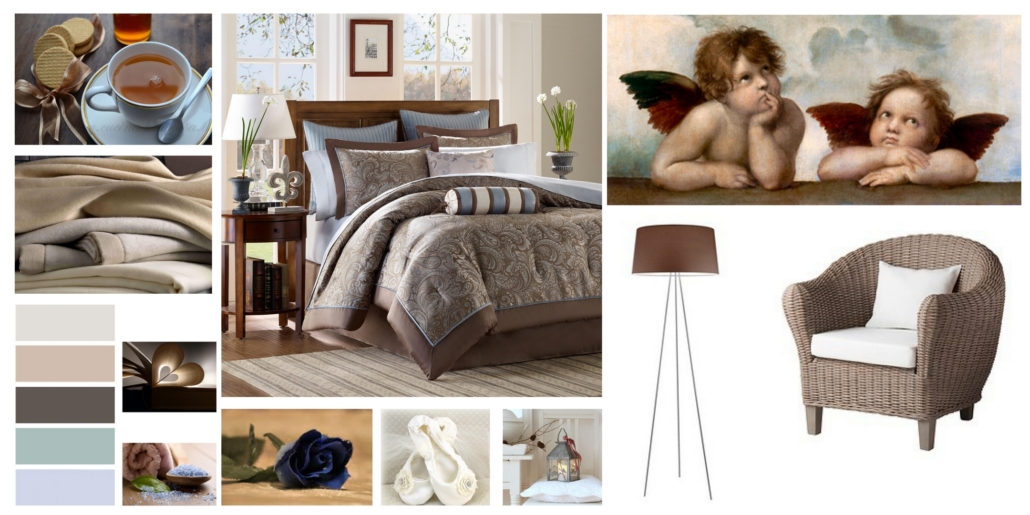
In both cases, start by collecting all the images you love into a folder on your computer.
As with Pinterest, I recommend using images of products and materials with clean, simple backgrounds.
Once you have everything, open PowerPoint or Canva and start arranging your images, resizing them so they fit well together.
Again, it’s easy to remove, add, or adjust images until the overall composition feels cohesive and harmonious.
For example, you might realize that the sofa you chose works well, but the color needs to change to achieve a better balance.
– PHOTOSHOP OR ILLUSTRATOR
These are both Adobe programs and extremely versatile tools.
Just like in Canva, you can choose your canvas size and easily set it up for printing.
With these programs, you can really get creative—playing with layouts, backgrounds, and image sizes.
Thanks to guides, you can also align everything perfectly, a small detail that makes a big visual difference.
They’re not difficult to use, but if you’re not familiar with them, they can take some time to learn.
I recently came across another online tool called Milanote.
It’s not designed just for mood boards, but for interior design projects more broadly.
I haven’t explored it fully yet, so I’m just mentioning it in case you’re curious—but I’ll definitely look into it more in the future!
As you can see, there are many ways to create a mood board.
The key is to use it correctly: the images you choose should reflect you, your personality, and your lifestyle.
Once your mood board is ready, take a moment and ask yourself:
Do I like what I see?
Does it truly represent me?
Can I improve it?
Play with the images, trying different color combinations, details, and moods until the result truly feels right to you.
The goal is to create a space that reflects who you are—one you’ll genuinely love.
Seeing everything together will guide you in the right direction and help you choose the right pieces for your space.
Otherwise, the risk is going out and buying things with only a vague idea in mind.
I hope this article on how to create a mood board was helpful!
Have you ever created one? If so, let me know in the comments!
If you need advice for your spaces, don’t hesitate to contact me!
This post is also available in: Italian


Leave a Reply
Want to join the discussion?Feel free to contribute!